What: Multi Image Editing feature lets you merge up to 5 images together
Model: Available with Gemini 2.5 Flash (Google's Nano Banana)
Access: Prompt Editor → Edit tab → Select "Gemini 2.5 Flash" → Upload images with "+" → Describe changes → Generate
Suitable For: Product placement, logo integration, creating backgrounds, marketing visuals
Tip: Use detailed prompts with Subject-Context-Style structure for good results
Multi Image Editing is a feature available with Gemini 2.5 Flash (Google's Nano Banana). This capability allows you to upload and merge multiple images together, providing various possibilities for designers, marketers, content creators, and businesses.
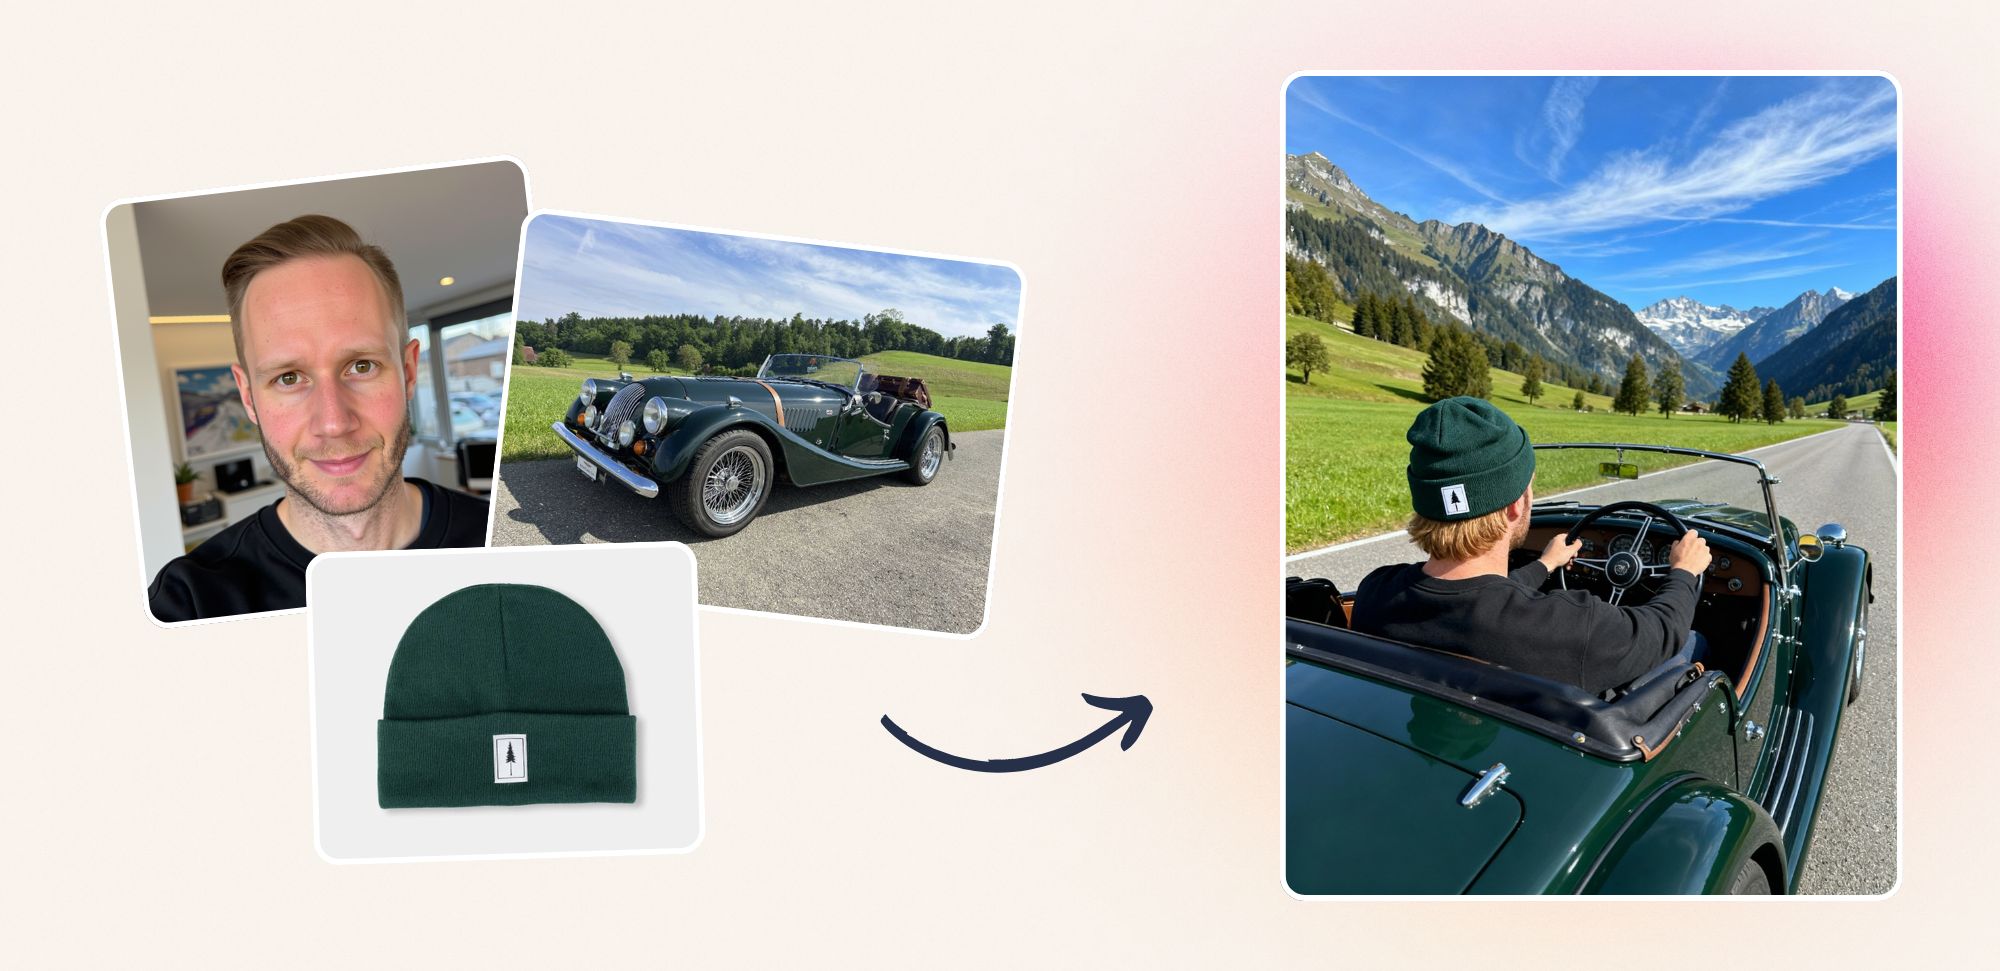
Multi Image Editing changes the way you work with images by allowing you to combine up to 5 different images into coherent, edited compositions. Whether you're adding your product to different environments, incorporating logos into scenes, or creating contexts for existing elements, this feature makes image editing accessible to everyone.
Merge Multiple Images: Combine up to 5 images
Context-Aware Placement: AI places elements in natural positions
Flexible Creation: Generate different backgrounds and settings for your uploaded images
Quality Results: Achieve photorealistic outputs
Getting started with Multi Image Editing is straightforward:
Navigate to the Prompt Editor in your workspace
Select the "Edit" tab
Choose the model "Gemini 2.5 Flash"
Click the "+" icon to upload your images (up to 5)
Describe your desired changes in the prompt field
Click Generate to create your composition

Prompt:
"Create a professional e-commerce fashion photo. Take the blue floral dress from the first image and let the woman from the second image wear it. Generate a realistic, full-body shot of the woman wearing the dress, with the lighting and shadows adjusted to match the outdoor environment."
Template:
Create a new image by combining the elements from the provided images. Take the [element from image 1] and place it with/on the [element from image 2]. The final image should be a [description of the final scene].
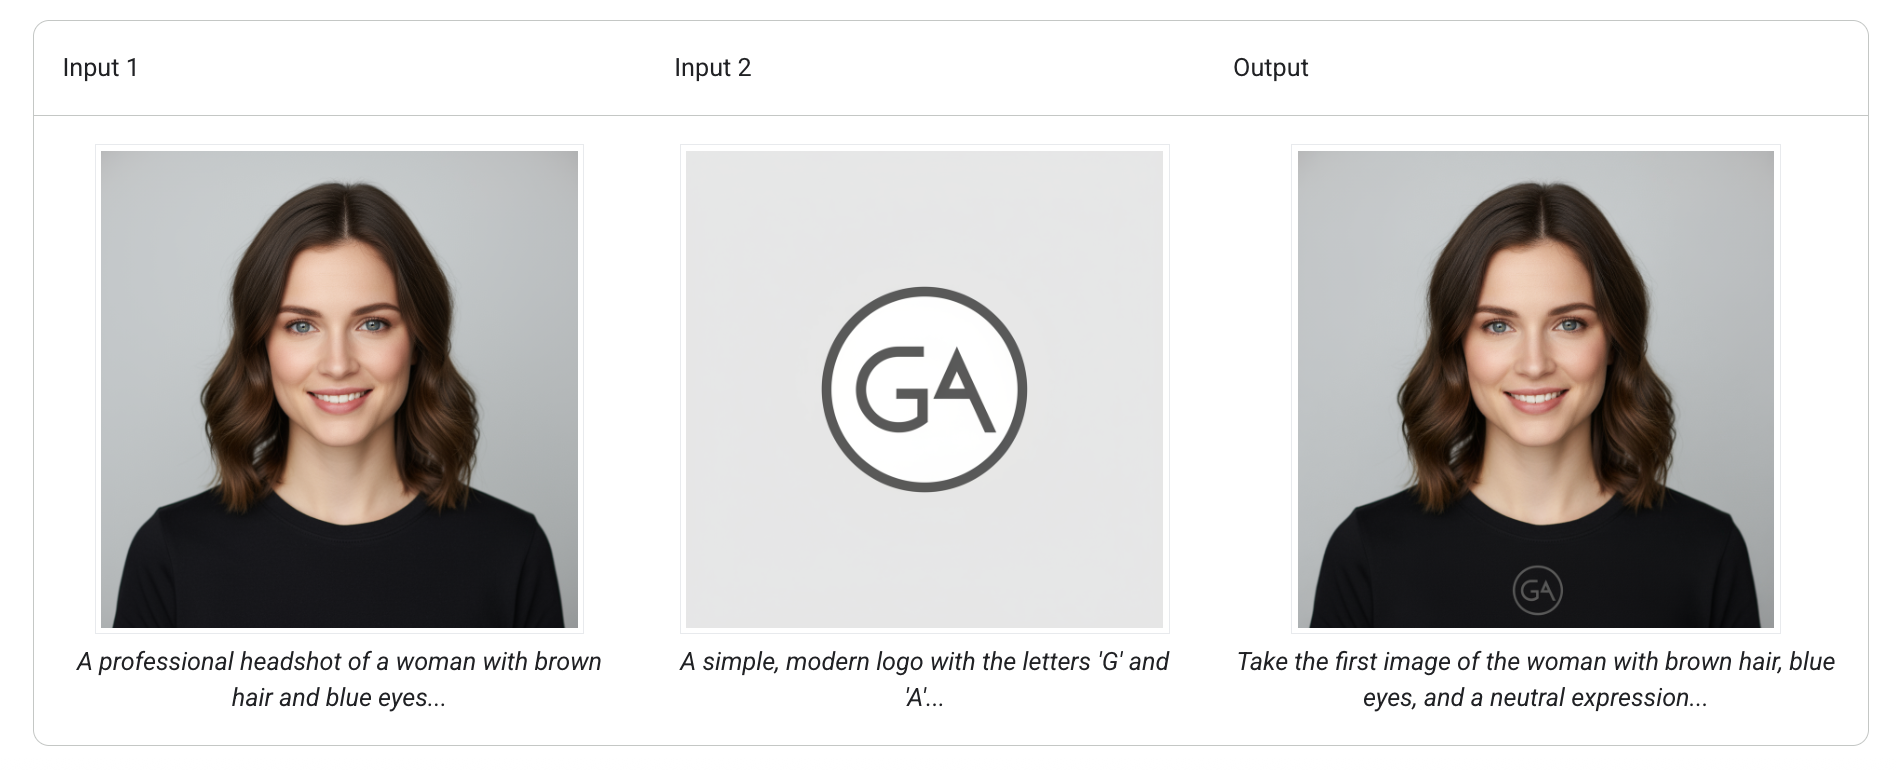
Prompt:
"Take the first image of the woman with brown hair, blue eyes, and a neutral expression. Add the logo from the second image onto her black t-shirt. Ensure the woman's face and features remain completely unchanged. The logo should look like it's naturally printed on the fabric, following the folds of the shirt."
Template:
Using the provided images, place [element from image 2] onto [element from image 1]. Ensure that the features of [element from image 1] remain completely unchanged. The added element should [description of how the element should integrate].
Multi Image Editing works well in scenarios like:
Product Photography: Place your products in various lifestyle settings
Brand Integration: Add logos and branding elements to different scenes
Creative Compositing: Combine different visual elements
Marketing Materials: Create visuals by merging product shots with backgrounds
Social Media Content: Generate varied images for your campaigns
E-commerce: Show products in various contexts without additional photoshoots
Based on Google's image generation practices, here are tips to improve your results with Multi Image Editing:
Follow the Subject-Context-Style framework:
Subject: Clearly identify what should be the focus (your uploaded images)
Context: Describe the background or environment you envision
Style: Specify the visual style (photorealistic, artistic, studio shot, etc.)
Example: "Place the red sneakers on a white pedestal in a modern studio with natural lighting, photorealistic style"
The AI works well with detailed instructions:
Use precise adjectives and positioning terms
Specify lighting conditions (golden hour, dramatic shadows, soft diffused light)
Mention camera angles or perspectives when relevant
Include environmental details that matter
Instead of: "Put the logo somewhere"
Try: "Position the logo in the bottom right corner at 20% opacity, maintaining brand colors"
For photorealistic results, use photography terms:
Lighting: "natural lighting," "dramatic lighting," "studio lighting"
Focus: "shallow depth of field," "bokeh background," "sharp focus"
Composition: "rule of thirds," "centered composition," "negative space"
Don't expect final results on the first try:
Start with your core idea, then refine
Adjust one element at a time to understand its impact
Save working prompts as templates for future use
Generate multiple variations to choose the appropriate result
When adding text to images:
Keep text under 25 characters for good results
Specify font style clearly ("bold serif," "minimalist sans-serif")
Indicate size preferences ("large heading," "subtle watermark")
Define exact placement when necessary
For functional image combinations:
Upload source images in good quality
Consider lighting consistency across images
Think about scale relationships between elements
Provide context about how elements should interact
Enhance output quality with these keywords:
General: "high-resolution", "detailed", "clear"
Photos: "4K", "HDR", "studio photography"
Artistic: "detailed", "refined", "precise"
"Place the watch on a marble surface with reflections,
surrounded by lifestyle items, shallow depth of field
focusing on the watch face, product photography style""Integrate the company logo as a watermark in the
bottom corner, 30% opacity, ensuring it doesn't distract from
the main product, maintaining brand color integrity""Combine the furniture pieces in a modern Scandinavian living room,
afternoon sunlight streaming through large windows, creating warm
shadows, interior design photography" DO:
DO:
Provide clear, detailed descriptions
Specify placement and relationships between elements
Use appropriate terminology when relevant
Iterate and refine your prompts
Consider lighting and perspective consistency
 DON'T:
Use vague or ambiguous instructions
Expect final results without iteration
Ignore scale and proportion relationships
Forget to specify style preferences
Images don't blend naturally?
Ensure lighting directions match across images
Specify how elements should cast shadows
Mention surface interactions explicitly
Wrong placement or scale?
Use precise positioning terms ("foreground," "centered," "left third")
Specify relative sizes ("twice the size of," "small in the background")
Reference real-world proportions
Style inconsistency?
Maintain consistent style keywords throughout your prompt
Specify if you want photorealistic or artistic interpretation
Use style references consistently
Multi Image Editing represents a development in AI-powered image manipulation. Whether you're a designer working on client projects or a small business owner creating marketing materials, this feature makes image editing capabilities accessible that previously required specialized software.
Start exploring the possibilities by heading to the Prompt Editor, selecting the Edit tab, and choosing Gemini 2.5 Flash. Upload your images, describe your requirements with a detailed prompt, and watch as AI transforms your ideas into visual results.
You can share your compositions with the community and discover how others are using this feature.
Multi Image Editing is available for all users with access to Gemini 2.5 Flash. For more detailed documentation and advanced techniques, refer to Google's official image generation guide.